My Girl Scouts made these pretty glass pins as a craft project for a scouting event. The project is easy but drying time accounts for a lot of the "time" in this project. You can make it too with these supplies.
* Clear glass garden pebbles that you can pick up at a crafting or gardening shop. It usually comes in bags of plenty so you can make a lot but note that these are not necessarily for crafting so you'll see some flaws in the stones and the shapes are not uniform. The pebbles come in different sizes. These are about 1.25" in diameter. I got my pebbles from Walmart.
*Decorative paper
*Brooch pins
*Clear finger nail polish to use a sealer.
*Tacky glue or clear drying glue.
*Optional Crazy Glue or a strong and permanent glue like E6000. When working with young children Tacky glue will be fine.
1. First cut the paper to a size that covers the flat bottom of your glass pebble. Because we were making a lot of these, I used a paper punch to cut my shape. The punch I had was a floral one but it worked out okay. You can see the floral pattern on the Hello Kitty and purple stone.
2. Seal your paper, front and back, with clear finger nail polish. You can do this ahead of time if you want it to be dry and have the kids skip this step. I used 2 coats on each side.
3. When the polish is completely dry, dab a little Tacky glue on the flat bottom of pebble. Place the decorative side of the paper on the bottom of glass and move the paper around to spread the glue. Try to get out any big air bubbles by pressing down on the paper. Let dry.
4. Place another coat (or 2) of nail polish over the bottom when the glue is dry. Try to make sure you get all the edges to prevent water from seeping in between the paper and pebble.
5. When the polish is dry, glue on a brooch pin with tacky glue or Crazy glue. Clean up any glue you might have gotten on the pebble with a wet cloth and a little scraping of finger nails.
6. Wear your unique creation!
I soaked my pin in water for over 2 hours and the water did not seep into the paper.
My kids and I made these pins without the finger nail polish sealer but when it got wet it started to fall apart. I also used Mod Podge and though it worked well on sealing the paper, it didn't work well on step 4 (the final seal) because I could scrape the Mod Podge off the glass when it was dry. I'd suggest to use inexpensive finger nail polish as a sealer for a longer lasting glass pebble pin.
You can make a very nice professional glass tile pendant with this Craft Bits tutorial.
Mar 10, 2009
Keiki Glass Pebble Pins
Mar 4, 2009
Crafts Carnival #4
Welcome to the March 4, 2009 edition of crafts carnival. Here are a bunch of terrific articles. Please be sure to visit the links for more great crafting ideas.
 Vera Lang presents Making Fabulous Paper Flowers with Tissue Paper posted at Fine Craft Guild .com, saying, "This is a tissue paper flowers craft project that is so simple, it can easily be done by children 6 years and up. You and they will love it, as each flower takes only minutes to produce and looks stunning! Easy Pro Results! Excellent illustrated tutorial."
 Matthew Paulson presents What to Do With Your Worn Out Jeans posted at American Consumer News. Lots of great ideas from making it into a pillow (as shown in photo) to passing it on to organizations that may need materials for crafting.
 Shen-Li Lee presents How to Make Your Own Soft Toy | Babylicious posted at Babylicious. A great video tutorial accompanies this post so you too can make one of these soft toys for your tot.
 Stephanie presents Quick and Easy Handmade Burp Cloths posted at Make It From Scratch. It's great to use what you make and these burp cloths will surely be used with a baby around.

A Keeper's Jackpot presents Making a Blanket Without a Sewing Machine posted at A Keeper's Jackpot. I've always wanted to make one of these blankets and now is the time especially with this chilly Hawaii weather!
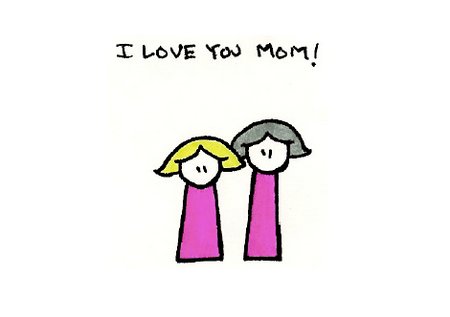 Take a look at these Printable Mothers Day Cards posted at Home Life Weekly. "Make your own printable Mothers Day cards. Its really quick and easy all you need to do is download the free Mothers Day Card design of you choice then print and fold."
 Linda Mundy presents Quilt Squares From Photographs posted at LJM's Studio: The Blog, saying, "Printing direct to fabric to create a quilt". These are so beautiful...imagine the possibilities!
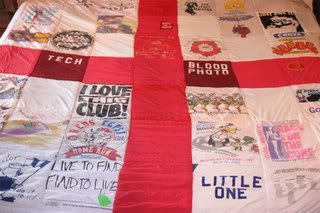 Condo Blues presents How to Make a T Shirt Quilt posted at Condo Blues, saying, "When life gives you too many t-shirts - make a quilt!". A great way to make use of all of your favorite shirts that are too precious to toss out.
 Marika presents Making sterling silver headpins without a torch posted at Marika's handcrafted jewellery. Wonderful tutorial with great images so you can follow along.
That concludes this edition of Keiki Gifts Craft Carnival. Thank you very much for being a part of carnival #4. Please submit your blog article to the next edition of crafts carnival using our carnival submission form. Past posts and future hosts can be found on our blog carnival index page.
Feb 18, 2009
DIY Ribbon Flowers

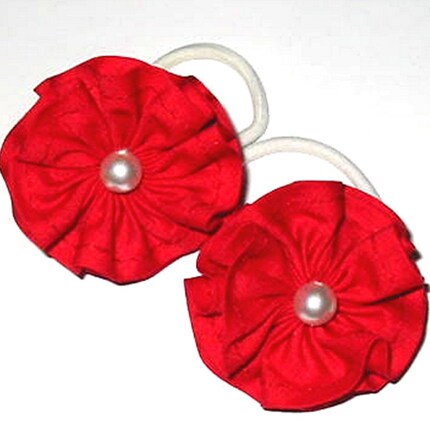
Ribbon has many uses. Ribbon can be used in the traditional way - wrapping gifts - or you can craft with ribbons for other decorative purposes. Offray has a "how-to" section on creating your own ribbon projects. I like adding ribbon flowers to rubber bands to make pretty keiki hair pieces. To make a ribbon flower similar to the one shown, visit this link for instructions.
http://keikigifts.etsy.com
On Sale at Keiki Gifts, Etsy
Red Floral Pony Tail Holder (set of 2)
$3.50 plus shipping
Feb 9, 2009
Crafts Carnival #3
Oh my! February 4th has come and gone. I scheduled that date for my Crafts Carnival #3. For all those who have submitted links and ideas, I apologize for the delay!
Here is a late welcome to the February 4, 2009 edition of Keiki Gifts Crafts Carnival.
- Nancy McCarroll presents How to Make Japanese Knotted Bags (borrowed instructions)Nancy's Arts, Crafts and Favorites, saying, "minimal skills required". I actually saw Nancy's post earlier this year and made a bag that my children still use. This is a great sewing project and the finished product is very nice.
- candy presents The Perfect Gift for a Friend: Intuitive Beading posted at Carrie and Danielle. Candy reminds us that intuition is an important muscle to use when making creative projects. Read about Candy's bead making tips and how she uses her intuition to make wonderful gifts.
- Not necessarily a crafty post but for those opening an online store or for those who want to learn more about web design, this post provides great information. Fiona King presents 50+ Free Open Courseware Classes for Web Designers Perfecting Their Craft posted at Distance Learning Net.
- Awwww...these are cute! This is something I would buy or hope someone would make for me. PDF instructions are provided to make vintage plant holders out of wood. InfoChick presents Plant Holders to Make With Your Jigsaw posted at The Vintage Info Network, saying, "A bunch of cheerful plant holders to make & paint - a Peasant Girl, a Chef, a Donkey, a Sail Boat, a Mexican and a bird for flower pot holding. And there are a few to hold individual flowers - a butterfly, a lady with flowers in her hat and hoop-skirted maiden."
- We always seem to be buying napkins for our messy household but that doesn't need to be the case if we can convert to cloth napkins. For "sew" and "no sew" instructions Condo Blues writes How to Use and Make Cloth Napkins and it is posted at Condo Blues.
- I found this post very helpful! Vera Lang presents 6 Ways to Use Stamps in Scrapbooking at Fine Craft Guild .com, saying, "A discussion of different stamping techniques and types of ink to use that of course is of use for card makers as well as scrappers! btw Lots of Valentine craft ideas on this blog this February..."
- Bath Salts would make great Valentine's Day gifts. Easy to make, pretty and many different varieties too! Bath Salts How To posted at Home Life Weekly, saying, "Making bath salts is quick, easy and simple and won’t take a lot of time out of your day"
- What a fabulous idea! Who knew cookie cutters could be used to make patterns for felt ornaments...certainly not me! DeeDee presents Things Your Grandmother Knew: Things To Do With Cookie Cutters #7 (Felt Ornaments) posted at Things Your Grandmother Knew
- Here is a tutorial on how to make practical as well a thoughtful handmade gifts for all those who need calendars (that would be just about everyone). Vera Lang presents Craft a Simple, Marvellous Desk Calendar posted at Fine Craft Guild .com, saying, "This calendar idea uses 100% recyclables. There is a page for each month, and of course, February will be a LOVE-FILLED themed page. I hope you like my sample project and I look forward to receiving pictures of calendars you've made."
- I am so touched whenever I receive a handmade quilt because I know a lot of hard work and love went into making it. Belle shares her quilt making ideas and project with us at Making Quilts from Old Clothing posted at Homesteaderbelle's Blog, saying, "This is a post about the quilts I make from old clothing. "
- Wow! This is tasty and beautiful. Wouldn't you love to give or receive a chocolate bouquet for Valentine's Day. I sure would! Josanne Anthony presents Another Chocolate Bouquet to Make! posted at Delightful Domestications, saying, "making a chocolate bouquet for Valentine's day"
- For machine and hand knitters, this one is for you...knittsings presents Free Stitch Design Software For Hand and Machine Knitting - Win_Crea posted at knittsings, saying, "Wincrea is a freeware program originally designed for the Passap E6000 knitting machine. However, it is a wonderful program that can be used by any craft requiring a grid layout, such as hand knitting, beading, etc."
- Nice job using the photoshop program. santoshi presents Black 31 posted at Black is beautiful, saying, "Creating art works using photoshop is my favourite hobby. Hope u like my works."
Jan 20, 2009
Simple Funky Earrings
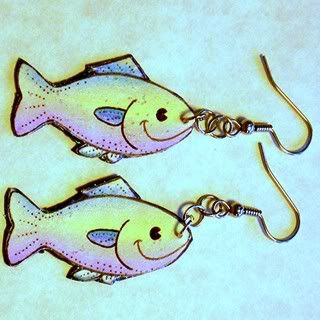 So you don't have any earrings to go with that dazzling muumuu with the colorful sea creatures and the bright, shimmering rainbow. No...those pearl earrings just won't do and that other one is kinda booorrring! Hey- no be shy...make your own earring and show off your distinctive
personality.
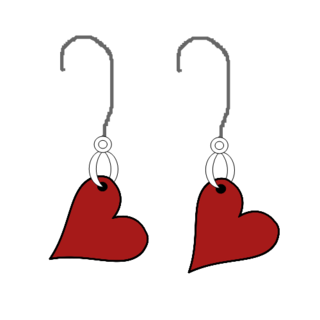
You can make earrings quite easily with inexpensive supplies purchased from your neighborhood craft store or recycled items from your home. Charms from broken necklaces can be attached to a jump ring and connected to an earring hoop or wire or just string up some beads to your earring wire. If you want something a little more eccentric, try working with stickers or paper cut- outs to create your own funky design like the fish earrings above. Instructions are as follows.
Materials:
decorative paper
sticker or cut-out image of your choice
craft glue
clear finger nail polish or sealer like Mod Podge
small paint brush (if you're using Mod Podge)
needle nose pliers
jump rings
earring wires
sharp scissors
needle
Directions:
1. Select your sticker or image that you want to make into earrings. In this case, a heart.
2. Apply a thin layer of craft glue to the cut-out or adhere the sticker to the back side of a piece of decorative paper that is slighter larger than the image.
3. If I am using a paper cut-out that is not already coated with varnish or sealer, I like to first seal to the image with nail polish. Let dry for about 10 minutes, then turn the image over and cover the decorative paper with sealer. Let dry about 10 minutes. Usually stickers are coated with a water resistant finish so I just seal the decorative paper with finger nail polish and not the sticker.
 5. Next, you will need to poke a hole in the image where you want to insert the jump ring. Open up the jump ring with your needle nose plier, hook it through the hole and onto the earring wire. Close jump ring.
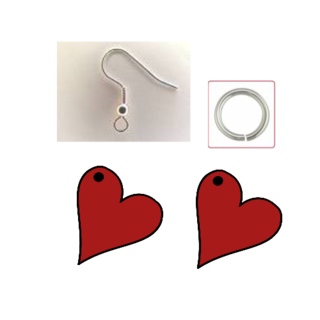
 If making jewelry for keiki, make sure you use lead free products such as sterling silver or gold.
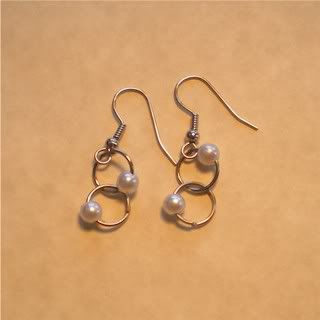
Other easy earrings to make:

Jan 14, 2009
DIY Gift Bags
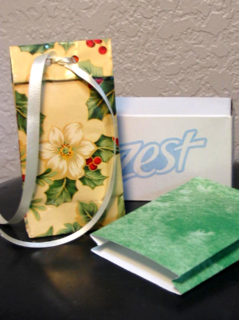 These are instructions on how to make your own gift bags that can hold bulkier items. Using a box as your template and recycled or pretty scrapbook paper, you can make an assortment of gift bags in many sizes. It's a little easier to make than the flat gift bags, posted earlier, because it's just like wrapping a present. My mini gift bags were made by using a soap box and a cassette tape case as templates.
Materials:
box template
paper
scissors
glue
Directions:
1. Wrap your paper around the box extending the paper over the bottom for folding. It's best if you start and end wrapping your paper on the narrow side of the box and glue down the overlapping edge.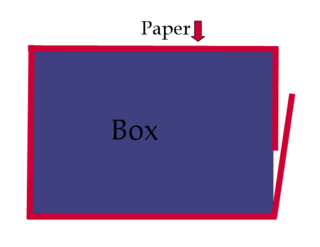
2. Just like you would do when wrapping a present, fold the sides in.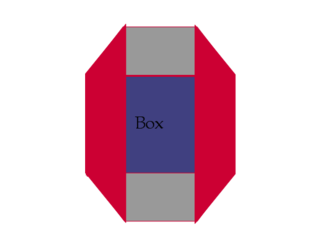
3. Now fold the top and bottom down and glue to secure.
4. Now slip your box out of the unsealed side and you have gift bag that is ready to use. Once your bag has been filled with goodies, fold the top over and seat with a sticker or punch a hole, thread ribbon through the hole and tie a bow.
Hope I explained it clearly enough...if not, just imagine wrapping a box and folding only one side closed rather than both ends.
http://keikigifts.etsy.com
On sale at Keiki Gifts, Etsy
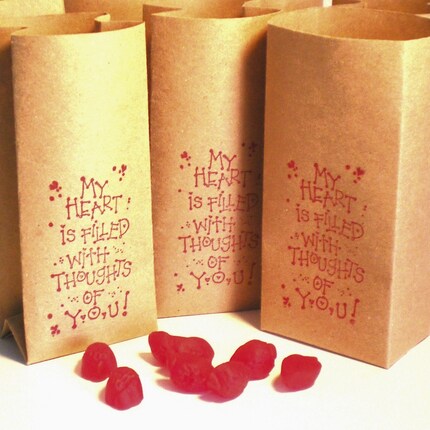
Thoughts of You Gift Bags, (set of 12)
$3.00 plus shipping
Jan 2, 2009
DIY Flat Gift Bags
 Happy New Year!
Here is a simple project to do with all the left over wrapping paper you may have salvaged from your opened Christmas gifts, decorative paper you have in your stash or even brown paper bags. You can turn these scraps into pretty gift bags or envelopes that you can use whenever needed.
This projects involve a just a little cutting, pasting and an old greeting card to use as a template. The card will determine the size of your bag. Later on when you get the idea of the sizes you'll need, you can pretty much work without a template and just repeat the procedures.
Materials:
decorative paper or brown grocery bags
glue
scissors
greeting card to use as template
Directions:
1. Place card on one corner of the wrapping paper matching edges. The wrapping paper should be cut a little larger than the card itself leaving one edges to fold up on one side and the bottom.
2. Fold the excess side along up along the edge of the card.
3. Fold the bottom up along the edge of the card.
4. Remove card and fold paper in half.
5. Unfold, open bottom fold and cut out orange section as shown using the creases as a guideline.
6. Open side flap and cut out orange corners in a triangular shape.
7. Fold side back down and place glue on flap.
8. Fold in half and place glue on bottom flap.
9. Fold up bottom flap to complete your bag.
I hope you enjoyed this simple project.
Dec 9, 2008
Mini Stuffed Christmas Ornaments
With a lot of grunting and groaning, we managed to get our Christmas tree up and positioned with a leftward lean to it displaying our tree's slightly insolent attitude. That cheekiness will be fixed right away once we get to the fun part - decorating! Out of our box of ornaments comes many years of baubles and knick-knacks either purchased, given as gifts or handmade and with it comes many warm memories of Christmases past. Our tree is a "tree of history" with it's mismatched trimmings and unconventioanl style. (I've resigned to the fact that I will never have an elegant looking tree themed with stylish gold ribbons and classy crystal ornaments.)
One ornament, the red dog above, has been in use for a few years now and is one of my daughter's favorite. It was made out of scrap fabric, stuffing, ribbons and felt pieces. The cherries and the worm are made in the same way. Santa is a felt guy and another story. My daughter has requested that we make a few more of these mini stuffed ornaments and I'll share the how-to with you. It's basically a bunch of "stuffed balls" glued together and its really simple to make. Materials:
Scrap Fabric
Glue Gun
Ribbon
Stuffing
Felt
Needle
Thread
Instructions:
1. Cut out circles using a cup, a small dish or the top of a spool of thread as a template. These pieces will become your animals torso, head and arms and legs.
2. Once you have your circles, sew a running stitch along the edge of the circle.
3. Pull the thread to gather up the sides, stuff, then tighten into a ball shape. Tie thread to secure.
4. Once you have all your balls, get your glue gun and glue the balls together, on the stitched side, to form your ornament. The dog was created by using a large round ball for the belly, a smaller ball for the head and tiny balls for the arms, legs and snout.
5. Cut out pieces of felt to make ears, eyes and nose. Glue into place.
6. Embellish with ribbons around the joints (i.e. neck) and sew a ribbon through the top of the doll to use as a hanger.
Experiment with different sized circles to make an assortment of ornaments. Simple huh? Have fun!
src="http://pagead2.googlesyndication.com/pagead/show_ads.js">