Showing posts with label keiki crafts. Show all posts
Showing posts with label keiki crafts. Show all posts
Apr 22, 2009
Three Blind Mice Origami Craft
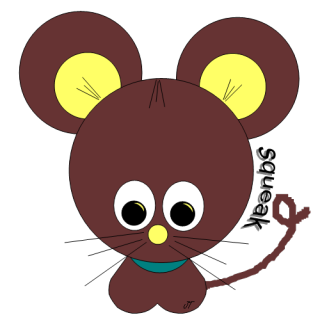
Head over to Tammy Yee's site to make a cute Three Blind Mice origami project. You'll be able to print the blind mice image onto your paper and fold according to the instructions provided . Once you're done, you can glue popsicle sticks onto the back of the mice and have them run away from the "farmer's wife".
Apr 11, 2009
Happy Easter
 If you're still thinking how you're gonna decorate your Easter eggs this year, here are some ideas:
Decoupaged Eggs
Dyeing Eggs
Jeweled Easter Eggs
Lovely and Loopy Eggs
Swirled Easter Egg
Happy Easter!
Mar 10, 2009
Keiki Glass Pebble Pins
 My Girl Scouts made these pretty glass pins as a craft project for a scouting event. The project is easy but drying time accounts for a lot of the "time" in this project. You can make it too with these supplies.
* Clear glass garden pebbles that you can pick up at a crafting or gardening shop. It usually comes in bags of plenty so you can make a lot but note that these are not necessarily for crafting so you'll see some flaws in the stones and the shapes are not uniform. The pebbles come in different sizes. These are about 1.25" in diameter. I got my pebbles from Walmart.
*Decorative paper
*Brooch pins
*Clear finger nail polish to use a sealer.
*Tacky glue or clear drying glue.
*Optional Crazy Glue or a strong and permanent glue like E6000. When working with young children Tacky glue will be fine.
1. First cut the paper to a size that covers the flat bottom of your glass pebble. Because we were making a lot of these, I used a paper punch to cut my shape. The punch I had was a floral one but it worked out okay. You can see the floral pattern on the Hello Kitty and purple stone.
2. Seal your paper, front and back, with clear finger nail polish. You can do this ahead of time if you want it to be dry and have the kids skip this step. I used 2 coats on each side.
3. When the polish is completely dry, dab a little Tacky glue on the flat bottom of pebble. Place the decorative side of the paper on the bottom of glass and move the paper around to spread the glue. Try to get out any big air bubbles by pressing down on the paper. Let dry.
4. Place another coat (or 2) of nail polish over the bottom when the glue is dry. Try to make sure you get all the edges to prevent water from seeping in between the paper and pebble.
5. When the polish is dry, glue on a brooch pin with tacky glue or Crazy glue. Clean up any glue you might have gotten on the pebble with a wet cloth and a little scraping of finger nails.
6. Wear your unique creation!
I soaked my pin in water for over 2 hours and the water did not seep into the paper.
My kids and I made these pins without the finger nail polish sealer but when it got wet it started to fall apart. I also used Mod Podge and though it worked well on sealing the paper, it didn't work well on step 4 (the final seal) because I could scrape the Mod Podge off the glass when it was dry. I'd suggest to use inexpensive finger nail polish as a sealer for a longer lasting glass pebble pin.
You can make a very nice professional glass tile pendant with this Craft Bits tutorial.
Dec 9, 2008
Mini Stuffed Christmas Ornaments
With a lot of grunting and groaning, we managed to get our Christmas tree up and positioned with a leftward lean to it displaying our tree's slightly insolent attitude. That cheekiness will be fixed right away once we get to the fun part - decorating! Out of our box of ornaments comes many years of baubles and knick-knacks either purchased, given as gifts or handmade and with it comes many warm memories of Christmases past. Our tree is a "tree of history" with it's mismatched trimmings and unconventioanl style. (I've resigned to the fact that I will never have an elegant looking tree themed with stylish gold ribbons and classy crystal ornaments.)
One ornament, the red dog above, has been in use for a few years now and is one of my daughter's favorite. It was made out of scrap fabric, stuffing, ribbons and felt pieces. The cherries and the worm are made in the same way. Santa is a felt guy and another story. My daughter has requested that we make a few more of these mini stuffed ornaments and I'll share the how-to with you. It's basically a bunch of "stuffed balls" glued together and its really simple to make. Materials:
Scrap Fabric
Glue Gun
Ribbon
Stuffing
Felt
Needle
Thread
Instructions:
1. Cut out circles using a cup, a small dish or the top of a spool of thread as a template. These pieces will become your animals torso, head and arms and legs.
2. Once you have your circles, sew a running stitch along the edge of the circle.
3. Pull the thread to gather up the sides, stuff, then tighten into a ball shape. Tie thread to secure.
4. Once you have all your balls, get your glue gun and glue the balls together, on the stitched side, to form your ornament. The dog was created by using a large round ball for the belly, a smaller ball for the head and tiny balls for the arms, legs and snout.
5. Cut out pieces of felt to make ears, eyes and nose. Glue into place.
6. Embellish with ribbons around the joints (i.e. neck) and sew a ribbon through the top of the doll to use as a hanger.
Experiment with different sized circles to make an assortment of ornaments. Simple huh? Have fun!
src="http://pagead2.googlesyndication.com/pagead/show_ads.js">
Dec 4, 2008
Keiki Gifts, Crafts & Activities: Re-Introduction
 Aloha! Thank you for visiting me here on the Hawaii WAHMs Blog. As I've announced on my Keiki Gifts, Crafts and Activities Blog, I have decided to continue my blog posts here on the Hawaii WAHMs Blog where I am a contributing writer. My Hawaii WAHM gang has always been here to support me through my struggles and growth and I'd like to thank them for this partnership. For those looking for a variety of interesting topics to read about, I believe here is the place to be because we have a swell team of writers and lots of things to talk about.
I look forward to making new friends here and to my old "followers" thank you for your continued support. Mahalo!
Archived Keiki Gifts Blog Posts
***Keiki Gifts, Crafts & Activities***
src="http://pagead2.googlesyndication.com/pagead/show_ads.js">
Subscribe to:
Posts (Atom)